WebdriverIO and Page Object Model: Designing Scalable Test Suites
Automated testing is an essential component of modern software development, as it allows us to identify and fix issues quickly and efficiently. However, as applications grow in size and complexity, maintaining and scaling automated tests becomes increasingly challenging. This is where WebdriverIO and the Page Object Model (POM) come in.
What is WebdriverIO?
WebdriverIO is a popular framework for automating JavaScript tests. It supports both synchronous and asynchronous test execution thanks to its simple syntax. This means we can write tests that handle operations like waiting for elements to load without resorting to complex control flow logic. WebdriverIO is based on the WebDriver protocol, which provides a standardized method of controlling web browsers.
What is Page Object Model?
Page Object Model (POM) is a design pattern used in automation testing to separate code that interacts with the UI of an application from the test logic. POM makes tests more maintainable and easier to scale by allowing changes to the UI without affecting the tests. To use POM, we create classes called Page Objects that encapsulate UI interaction code for each page or component of an application. POM allows tests to interact with the UI without needing to know the details of how that interaction is implemented.
This article will show you how to use POM in WebdriverIO to create more efficient and robust automated test suites. So, let’s get started on how to build scalable test suites with WebdriverIO and POM!
Pre-requisites
- Node.js (version 12 or later)
- npm (version 6 or later)
- Source code editor e.g. Visual Studio Code
Initial Project Setup
Step 1: Create a new Node.js project
We’ll start by creating a new project and naming the project folder wdio-demo. Using the terminal or command line, run the following command. It will generate the default configurations needed for the tests.
npm init -yStep 2: Install WebdriverIO and its dependencies
Next, we need to install WebdriverIO and its dependencies. Run the following command in your terminal which will install WebdriverIO and its CLI tool as dev dependencies in your project:
npm install webdriverio @wdio/cli --save-devStep 3: Generate a configuration file
WebdriverIO uses a configuration file to set up your testing environment. We can generate a default configuration file using the CLI tool we installed in the previous step. Run the following command in your terminal:
npx wdio config -yThis will launch a wizard to guide you through generating a configuration file. Answer the questions according to your testing needs, and a wdio.conf.js file will be generated in your project root directory.
Once all the steps above are done, your test project folder will look something like this:

Step 4: Install dependencies and configure the test report
Next, we need to install the dependencies that will allow us to generate an HTML report for the test execution. In this example, we will use Allure for the test report. Run the following command in your terminal which will install @wdio/allure-reporter and allure-commandline as dev dependencies in your project:
npm install webdriverio @wdio/allure-reporter allure-commandline --save-devOnce the dependencies installation is done, you can modify your wdio.conf.js file by adding the following configuration to enable the generation of test reports through Allure and the capture of a screenshot at the completion of each test.
exports.config = {
reporters: ['spec', ['allure', {
outputDir: './allure-results',
disableWebdriverStepsReporting: true,
disableWebdriverScreenshotsReporting: false,
}]],
afterTest: async function (test, context, { error, result, duration, passed, retries }) {
await browser.takeScreenshot();
},
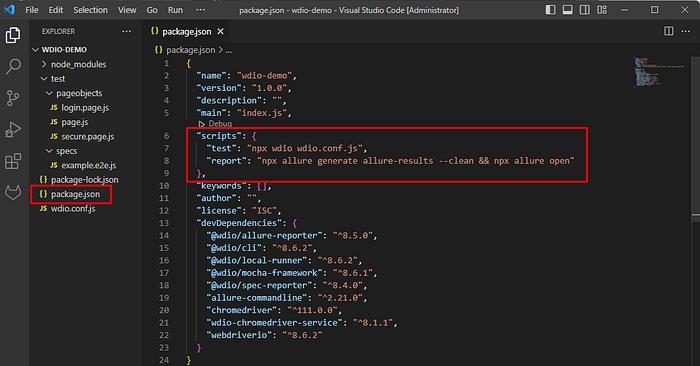
}Lastly, within your package.json file, add the following config which will allow you to use npm test command to execute all the tests, and npm run report command to generate the Allure HTML reports.
"scripts": {
  "test": "npx wdio wdio.conf.js",
  "report": "npx allure generate allure-results --clean && npx allure open"
}
Creating Tests
Step 1: Write your page objects
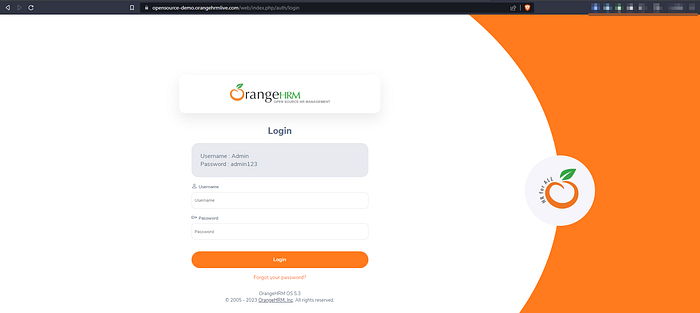
In this section, using a sample application https://opensource-demo.orangehrmlive.com/, we will use WebdriverIO to interact with the application’s UI and create a Page Object for each page.
We will start with a main page object which contains all methods, selectors, and functionality shared across all page objects. In this example, we will name the file as page.js
module.exports = class Page {
    open (path) {
        browser.maximizeWindow();
        return browser.url(`https://opensource-demo.orangehrmlive.com/${path}`)
    }
}
Here’s an example of what our Page Object for the login page might look like which contains specific selectors and methods that exist on the Login Page. In this login.page.js file:
- Selectors are defined using getter methods.
- We’ve also added a method to encapsulate automation code to interact with the page e.g.
async loginto log in using a username and password. - The page extends a main page object and allows overwriting specific options from the main page object to adapt it to the Login Page object for example with the function
open.
const Page = require('./page');

class LoginPage extends Page {
    get inputUsername () {
        return $('//input[@name="username"]');
    }

    get inputPassword () {
        return $('//input[@name="password"]');
    }

    get btnLogin () {
        return $('//button[contains(.,"Login")]');
    }

    get errorMessageInvalidCredentials() {
        return $('//*[text()="Invalid credentials"]');
    }

    async login (username, password) {
        await this.inputUsername.setValue(username);
        await this.inputPassword.setValue(password);
        await this.btnLogin.click();
    }

    open () {
        return super.open('web/index.php/auth/login');
    }
}

module.exports = new LoginPage();
We will also create a new page object to store the locator of the user area’s header that only logged-in users can access called header.page.js .
const Page = require('../page');

class Header extends Page {
    get headerUserArea () {
        return $('//*[@class="oxd-topbar-header-userarea"]');
    };
};

module.exports = new Header();
Step 2: Write your first test
Once we’ve created our Page Objects, we can use them to write maintainable and scalable tests. For example, we will write a login test using the Page Object for the login page for the following scenarios:
- make sure users can log in when they enter valid credentials
- make sure users get a correct error message when invalid credentials entered
Here’s an example of what that tests might look like:
const LoginPage = require('../pageobjects/login.page')
const Header = require('../pageobjects/client/header.page')

describe('Login Page', () => {
    beforeEach(async() => {
        await LoginPage.open();
    });

    it('allows users to log in with valid credentials', async () => {
        await LoginPage.login('Admin', 'admin123');
        await expect(Header.headerUserArea).toBeExisting();
    });

    it('displays an error message for invalid credentials', async () => {
        await LoginPage.login('Admin', '123');
        await expect(LoginPage.errorMessageInvalidCredentials).toBeExisting();
    });
});
Step 3: Run the test
Finally, let’s run the test we just wrote. Run the following command in your terminal:
npm testOnce all the tests are executed, the output will look something like this.

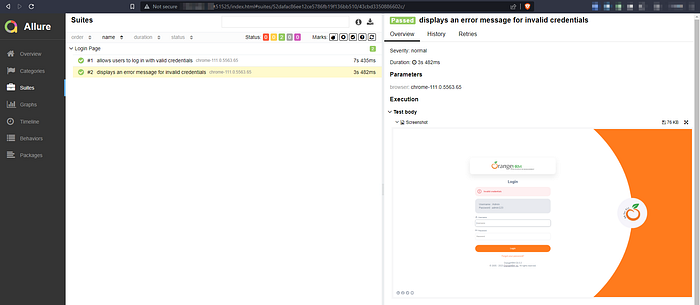
Step 4: Generate the test report
Run the following command in your terminal:
npm run reportThis will create a new folder called allure-report which will store and open the newly generated HTML report.
Congratulations! You’ve successfully set up WebdriverIO and written your first automated test.
In conclusion, WebdriverIO and POM are powerful tools that can help us create maintainable and scalable automated tests. By following best practices and designing tests using POM, we can ensure our automated tests remain effective and efficient as applications grow in size and complexity. In this article, we’ve also walked through the process of setting up WebdriverIO from scratch and writing your first test. I hope this guide has been helpful in getting you started with WebdriverIO. Happy testing!